Running out of space on your PC is one of those problems that shows up at the worst time: updates fail, apps won’t install, and your laptop suddenly feels slower. With Windows 11 Storage Sense, you can automate the cleanup so temporary files, old Recycle Bin items, and other clutter don’t pile up again. This guide walks you through a safe setup, a first test run, and practical settings that keep disk space under control.
Introduction
Your Windows 11 PC creates a surprising amount of “invisible” clutter. Every browser session leaves caches behind, installers unpack temporary files, and Windows updates store leftovers so you can roll back if something goes wrong. Over time, that can push your system drive (usually C:) into the red, and then small annoyances start: downloads fail, photo imports stop halfway through, and Windows Update suddenly needs attention.
Storage Sense is Windows’ built-in housekeeping feature. Instead of doing a manual cleanup every few weeks, you can let Windows tidy up automatically on a schedule or when disk space gets low. The goal isn’t aggressive deletion—it’s predictable maintenance, so you stay comfortably away from “Low disk space” warnings. The steps below help you enable Storage Sense, choose safe thresholds, and avoid surprises with folders like Downloads or cloud files.
Basics and Overview: What Windows 11 Storage Sense Actually Does
Storage Sense is part of the Storage settings in Windows 11. When enabled, it can automatically remove certain types of files that are usually safe to delete, such as temporary system and app files. Depending on what you allow, it can also clean up items that have been sitting in the Recycle Bin for a while and (optionally) files in your Downloads folder that you haven’t opened for a set period.
Two terms help when configuring it: “temporary files” (leftovers created for installation, updates, or app operation) and “retention period” (how long Windows keeps something before cleaning it up). Storage Sense is mainly designed for the system drive, where Windows itself is installed.
Storage Sense works best when it’s conservative: clean temporary files regularly, and only auto-delete personal folders like Downloads if you fully understand the trade-offs.
If you use OneDrive with Files On-Demand, Storage Sense can also make rarely used cloud files “online-only” again. That saves local space without deleting the file from the cloud—but it does mean you’ll need an internet connection to open it later.
| Option or Variant | Description | Suitable for |
|---|---|---|
| Low-space cleanup | Runs mainly when Windows detects storage pressure; focuses on temporary files. | People who want minimal automation and fewer surprises. |
| Scheduled cleanup | Runs on a regular cadence (daily/weekly/monthly) you select. | PCs that fill up steadily (school/work devices, shared family PCs). |
Preparation and Prerequisites: Set Yourself Up for a Safe Cleanup
Before turning on automation, take two minutes to check what kind of files might be affected. Storage Sense is generally safe, but the “Downloads” option and cloud file behavior can surprise people if they rely on those folders as long-term storage.
Quick checklist:
- Know your system drive: In File Explorer, look for Windows (C:). That’s where Storage Sense is most relevant.
- Review your Downloads folder: If it contains important installers, school documents, or receipts, plan to keep auto-deletion disabled for Downloads.
- Check OneDrive basics (optional): If you use OneDrive, understand the difference between “available when online” and “always keep on this device.”
- Close big tasks: If you’re in the middle of a large download or update, wait until it finishes.
- Have a fallback: If you’re extremely low on space, you may want to move a few large files (videos, game recordings) to an external drive first so Windows has breathing room.
Good to know: Storage Sense settings are in Windows Settings, so you’ll need access to the account that can change system settings on the PC.
Step-by-Step Instruction: Enable Storage Sense and Choose Practical Settings
The menus can differ slightly depending on Windows 11 updates, but the path stays consistent: you’re looking for Settings → System → Storage.
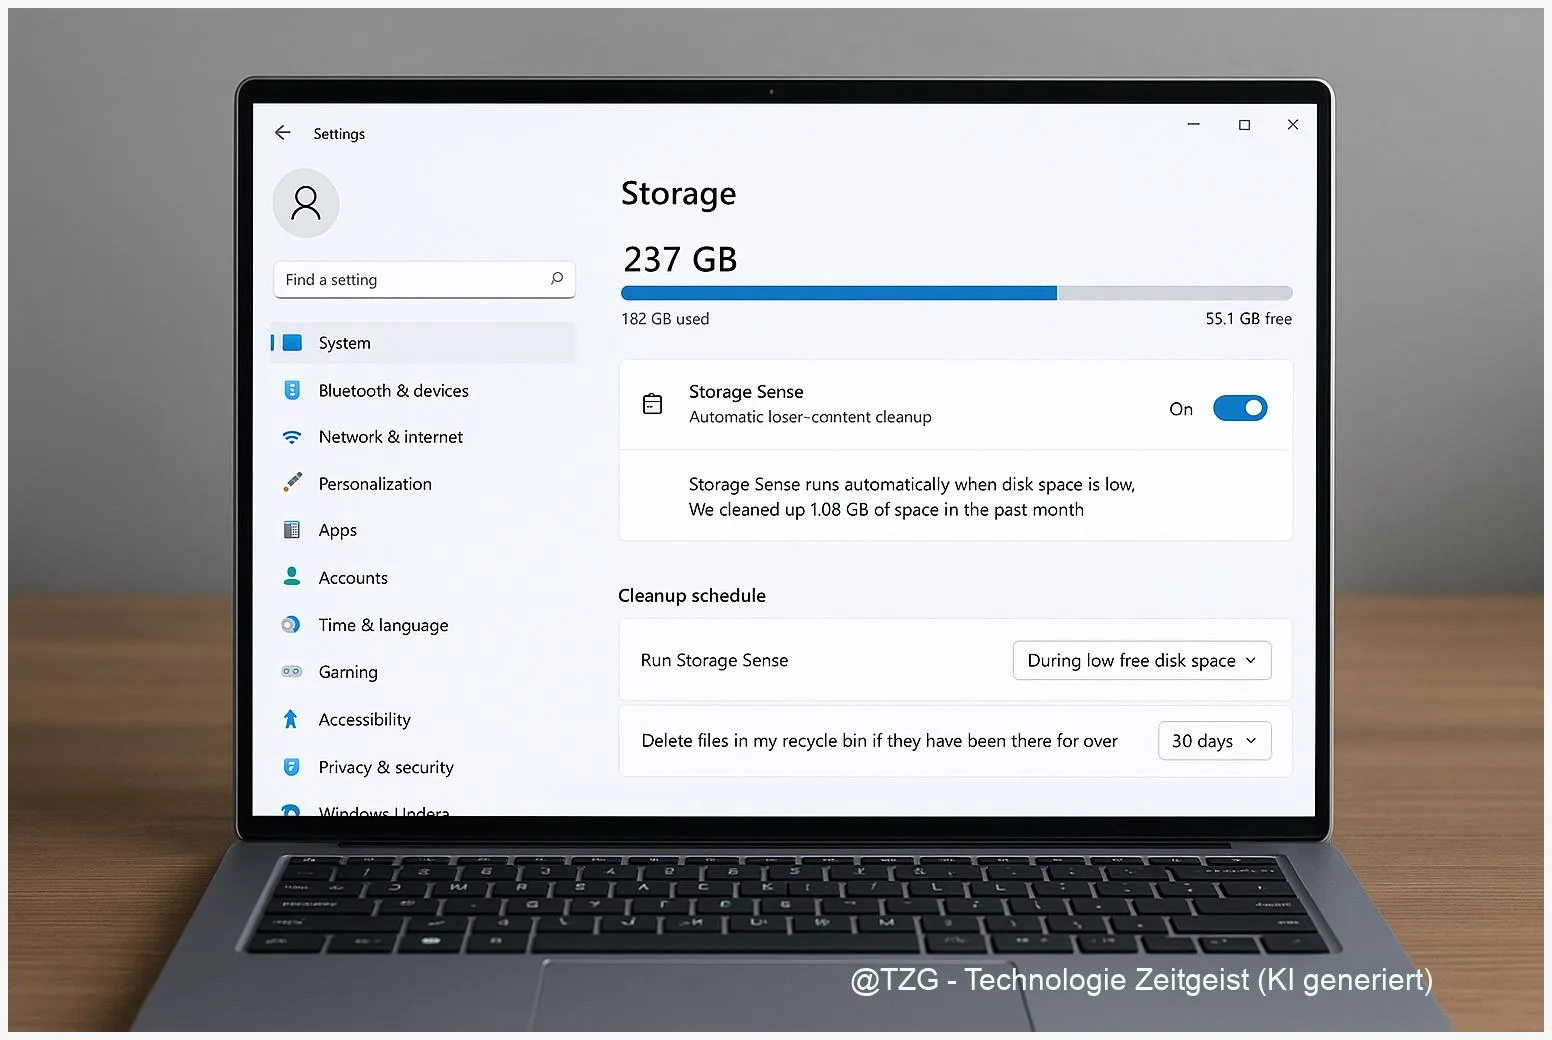
- Open Storage settings: Press Windows key + I to open Settings. Go to System, then select Storage.
- Turn on Storage Sense: Find Storage Sense and switch it to On.
- Open the detailed options: Click Storage Sense (not just the toggle). You’ll see options for when it runs and what it cleans.
- Choose when it runs: Under the schedule option (wording may be “Run Storage Sense”), pick a cadence. A solid everyday choice is Every week. If you prefer minimal automation, choose During low free disk space.
- Set Recycle Bin cleanup: Enable Recycle Bin cleanup and choose a retention period that fits your habits. Many people are comfortable with 30 days so accidental deletions can still be recovered for a while.
- Decide about Downloads carefully: If you use Downloads as a temporary inbox, you can enable it with a longer retention period. If Downloads is your “important stuff” folder, set it to Never.
- (Optional) Review cloud file behavior: If you use OneDrive Files On-Demand, check the option that can make inactive files online-only. Leave it off if you often work offline.
- Test with a manual run: Use the button to run Storage Sense immediately (often labeled like “Run Storage Sense now”). This first run lets you confirm the results while you still remember what you changed.
After the run, go back to System → Storage. The storage overview should show more free space, and “Temporary files” should be smaller. If nothing changes, don’t panic—sometimes you simply didn’t have much temporary data to remove.
Tips, Troubleshooting, and Variants
Tip: Pair Storage Sense with “Cleanup recommendations.” In the same Storage area, Windows can suggest large files, unused apps, or other categories to review. Storage Sense handles routine clutter; recommendations help with the “big wins” when space is tight.
Common stumbling block: Downloads got cleaned. If files disappear from Downloads, it’s usually because the Downloads cleanup option was enabled and the retention period was too short. Set Downloads to Never (or increase the number of days) and consider storing important files in Documents or a dedicated folder.
OneDrive files became online-only. This is not deletion from the cloud. It removes the local copy to save disk space. If you need a file offline, mark it in OneDrive as “Always keep on this device” and it should remain stored locally.
Storage Sense didn’t run when you expected. Try a manual run first. Also check whether your PC is updated and whether you’re looking at the system drive. Microsoft’s documentation notes Storage Sense is primarily designed for the system drive, so don’t expect it to automatically clean up every secondary disk.
Variant: You want stronger manual cleanup (sometimes necessary). If you still need more room, use Windows’ built-in Disk Cleanup tool (cleanmgr) for a one-time deeper cleanup. This is useful after large Windows updates, but it’s a manual step—not the automated day-to-day approach Storage Sense provides.
Conclusion
Storage Sense is one of the easiest ways to keep a Windows 11 PC healthy over the long term, because it prevents small leftovers from turning into a full drive. A conservative setup—weekly runs, regular temporary file cleanup, and a sensible Recycle Bin retention—usually delivers the best balance between safety and convenience. If you treat the Downloads folder as temporary, you can automate it too, but it’s worth being cautious. Once configured, Storage Sense quietly reduces “low disk space” stress and makes updates and everyday work more reliable.
Try a conservative Storage Sense setup today, then check your free space again in a week—what settings worked best for your routine?


Leave a Reply