Passwords get phished, reused, and forgotten. With a proper passkeys setup, you can sign in using Face ID, fingerprint, or a device PIN instead—without typing a password. This guide walks you through enabling passkeys on iPhone, Android, Windows 11, and Mac, plus what to check beforehand and what to do if a passkey won’t show up. Afterward, you’ll know how to create, use, sync, and manage passkeys across your devices.
Introduction
Many everyday logins still depend on a secret you have to remember and type. That’s where things go wrong: a fake sign-in page, a reused password from an old app, or a rushed login on a shared computer. Passkeys change that flow. Instead of proving “what you know” (a password), you prove “it’s you” with a device you already trust—your phone, laptop, or a security key—then confirm with Face ID, a fingerprint, or a device PIN.
The practical goal is simple: faster sign-ins with fewer lockouts, and better protection against phishing. The challenge is that the setup looks slightly different on iPhone, Android, Windows, and Mac—and syncing can be confusing. The steps below keep it calm and predictable: first the basics, then what to prepare, then one clear walkthrough that works across platforms.
Basics and Overview: what passkeys are (and why they feel easier)
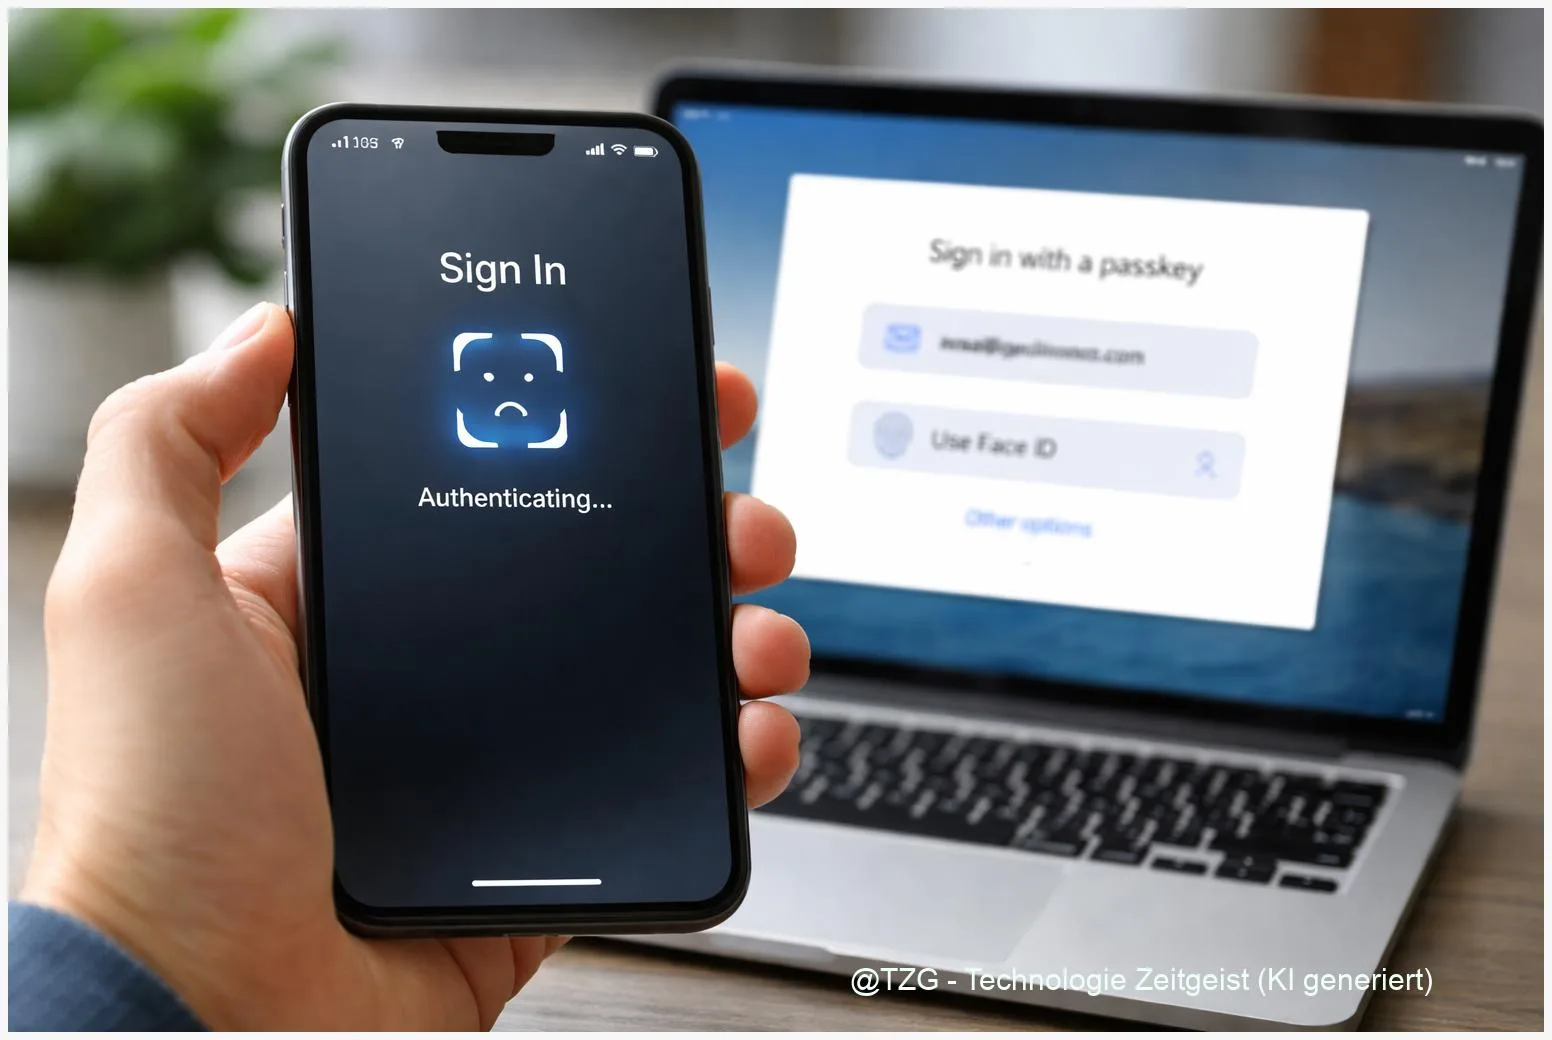
A passkey is a modern sign-in method based on the FIDO/WebAuthn standard. In everyday terms: a website or app gets a “public key,” while your device keeps the matching “private key” securely. When you sign in, your device proves it has the private key—after you unlock it with Face ID/Touch ID, a fingerprint, or a PIN. Your biometric data doesn’t get sent to the website; it stays on your device.
A passkey can’t be “typed into” a fake website the way a password can—so it’s naturally more resistant to phishing.
Passkeys can be saved in a system credential manager (for example iCloud Keychain on Apple devices, Google Password Manager on Android/Chrome, or Windows passkey storage with Windows Hello). Many services still keep passwords as a fallback, but you can often switch your account to “prefer passkey.” If you already use a password manager, check whether it supports passkeys too; that can help if you regularly switch between platforms.
| Option or Variant | Description | Suitable for |
|---|---|---|
| Phone-first passkeys | Create and store passkeys on iPhone/Android; use them on other devices via QR/Bluetooth prompts. | Most people who always have their phone nearby. |
| Device-local passkeys | Create passkeys directly on Windows or Mac and unlock with Windows Hello or Touch ID. | Desktop-focused users or shared-family phone situations. |
Preparation and Prerequisites for a smooth passkeys setup
Before you create your first passkey, take two minutes to check the basics. Most “passkey not working” situations come from missing screen locks, disabled syncing, or outdated browser/system settings.
Quick checklist:
- Use a screen lock you control: Face ID/Touch ID, fingerprint, or at least a device PIN/passcode. Passkeys typically require this to be enabled.
- Update the OS and main browser: Passkeys are built into current iOS/iPadOS, Android, Windows 11, macOS, and modern browsers like Safari, Chrome, and Edge.
- Enable the platform’s sync (optional but recommended):
- iPhone/Mac: iCloud Keychain enabled so passkeys sync across Apple devices.
- Android/Chrome: Google Password Manager enabled for storing and syncing passkeys.
- Windows 11: Windows Hello set up (PIN, face, or fingerprint) and passkey support enabled in Windows settings.
- Keep a recovery method: Even with passkeys, make sure your accounts have recovery email/phone or backup codes set up. Passkeys reduce risk; they don’t remove the need for recovery planning.
- Know where you’ll manage them: Apple’s Passwords/iCloud Keychain, Google Password Manager, or Windows Settings can show and remove passkeys.
If you’re also cleaning up your old credentials, TechZeitGeist has a practical companion guide on setting up a password manager and importing passwords safely (useful for reducing “leftover” logins while you move to passkeys).
Step-by-Step Instruction (iPhone, Android, Windows 11, Mac)
The exact button labels vary by website and app, but the flow is consistent: open the account’s security settings, choose “Passkey,” confirm on your device, then test a sign-in. Use the steps below as your reliable route.
- Pick one account to start with (low stress). A good first choice is a major account you sign into often, such as a Google Account or Microsoft account, because they support passkeys broadly and work across many devices.
- On iPhone (Apple passkeys via iCloud Keychain): Enable iCloud Keychain in Settings (under your Apple Account/iCloud settings for passwords/keychain). Then, on a supported website/app, choose an option like “Create passkey” or “Use passkey.” Confirm with Face ID or Touch ID. Your passkey will be saved to iCloud Keychain and becomes available across your signed-in Apple devices.
- On Android (Google passkeys via Google Password Manager): Make sure screen lock is enabled. When a supported site offers a passkey, select “Create passkey” and confirm with fingerprint/face/PIN. You can manage passkeys in Google Password Manager (often reachable via Chrome settings). If you use multiple Android devices, keep sync enabled so the passkey follows you.
- On Windows 11 (Microsoft account passkey / Windows storage): Set up Windows Hello first (Settings typically guides you through a PIN, then optional face/fingerprint). Then go to your Microsoft account security/sign-in options online and add a passkey, or create a passkey when a supported site offers it. When signing in later, look for “Sign-in options” and choose a passkey method, then confirm via Windows Hello.
- On Mac (Safari + iCloud Keychain): Ensure iCloud Keychain is enabled on the Mac with your Apple Account. In Safari (or a supported app), choose “Create passkey.” Confirm with Touch ID (or your Mac login method). The passkey syncs through iCloud Keychain, similar to iPhone.
- Test the sign-in immediately. Sign out of that service once, then sign back in and choose the passkey option. A correct setup usually shows a biometric prompt (Face ID/fingerprint) or a Windows Hello dialog instead of a password field.
- Decide on your fallback. If the service lets you keep a password, keep it for now until you’re confident. If it offers “prefer passkey” or “skip password,” enable that only after a successful test on your main devices.
If everything worked, you should see fewer password prompts across your devices. If the service still asks for a password sometimes, it often means you’re on a device/browser that doesn’t yet have access to the same passkey store, or the site hasn’t fully switched your account to prefer passkeys.
Tips, Troubleshooting, and Variants
Passkeys are designed to reduce friction, but a few practical stumbling blocks are common—especially when you switch between phone and desktop.
Common issues and fixes:
- No passkey option appears: The website/app may not support passkeys for your account type yet, or you’re in an embedded browser view. Try the same login in a full browser (Safari/Chrome/Edge) and check the account’s Security settings for “Passkeys.”
- Passkey is on the phone, but not on the computer: On Apple devices, confirm iCloud Keychain is enabled on both iPhone and Mac. On Android/Chrome, confirm Google Password Manager sync is on. On Windows 11, ensure Windows Hello is set up and you’re using a passkey-capable browser.
- QR code / cross-device sign-in fails: Cross-device passkey sign-in typically relies on Bluetooth proximity. Turn on Bluetooth on both devices, keep them close, and retry. If you’re on a restrictive corporate device, policies may block Bluetooth-based flows.
- Biometrics fail or aren’t available: You can usually fall back to the device PIN/passcode. If that also fails, reset the device’s biometric setup (for example, re-add fingerprints) and try again.
- You replaced your phone: If your passkeys were syncing (iCloud Keychain or Google Password Manager), they should reappear after you sign in and enable sync on the new device. If they were stored only locally, you may need to create new passkeys per service.
Practical variants:
- Use a hardware security key as backup: Some accounts allow storing a passkey on a FIDO2 security key. That can be helpful if you want a non-phone backup for travel or emergencies.
- Keep two passkeys for critical accounts: If the service allows it, create one passkey on your phone and one on your main computer. That reduces dependency on a single device.
- Don’t rush removing passwords: Removing the password can be a good security step, but only after you’ve tested your sign-in on all devices you actually use (work laptop, home PC, tablet).
If you’re curious about the bigger picture, TechZeitGeist also covers broader security habits (beyond passkeys) in its archives and guides, for example in the How-Tos, Guides & Reviews section.
Conclusion
Passkeys reduce the two classic login problems at once: they’re harder to phish and easier to use day to day. The key to success is a clean setup: enable a screen lock, turn on the right sync (iCloud Keychain or Google Password Manager), set up Windows Hello on Windows 11, and then create a passkey on one trusted account first. Once you’ve tested sign-in on your real devices, you can gradually switch more services to passkeys and keep passwords mainly as a fallback.
Have you already switched one of your main accounts to passkeys? Share what worked (or what got stuck) and which device you started with—your experience helps others avoid the same hurdles.


Leave a Reply