If your PC suddenly slows down, your browser keeps redirecting, or Windows shows repeated warnings, you likely want to remove malware on Windows 11 fast and safely. This guide walks you through Microsoft Defender in the Windows Security app: updating protection, running the right scan (including a full scan and the Microsoft Defender Offline scan), and handling results in Protection History and quarantine.
Introduction
Malware rarely announces itself clearly. Often it feels like “Windows got weird”: fans ramp up in idle, apps start slowly, pop-ups appear, or a login you never used suddenly triggers a security email. Sometimes it is not even classic malware but unwanted software that changes browser settings, adds extensions, or installs background tasks.
The good news is that Windows 11 already includes Microsoft Defender (in the Windows Security app). For many everyday cases it is enough to detect threats, isolate them in quarantine, and remove what should not be there. The key is choosing the right scan type and knowing what to do with the results afterward.
The steps below are designed to be calm and repeatable: update protection, run targeted scans first, escalate to a full scan or an offline scan if needed, then verify what Defender did in Protection History.
Basics and Overview: remove malware Windows 11 with Defender
On Windows 11, Microsoft Defender Antivirus is built into the Windows Security app. It can scan files and running processes, block known bad behavior, and place suspicious items into quarantine. Quarantine means the file is isolated so it cannot run, but it is still stored so you can review or restore it if it was a false alarm.
When you start a scan, you can choose different scan types. A Quick scan focuses on common malware locations and system areas. A Full scan checks all files and programs on the device and can take a long time, depending on how much data you have. A Custom scan is useful for a specific folder or an external drive. The Microsoft Defender Offline scan restarts your PC and scans from a trusted environment outside the normal Windows session, which can help against stubborn threats.
A practical rule: start small (update + quick/custom scan), then escalate (full scan), and use the offline scan when malware may be actively resisting cleanup.
Microsoft also provides a “Protection History” view where you can review what was detected and what action was taken. That is where you confirm removal, remove leftovers, or carefully restore an item if you are sure it is safe.
| Option or Variant | Description | Suitable for |
|---|---|---|
| Quick scan | Checks common locations and active system areas first. | First check when something feels off, routine scanning. |
| Microsoft Defender Offline scan | Restarts the PC and scans outside the normal Windows session. | Persistent threats, suspected rootkits, repeated re-infections. |
Preparation and Prerequisites
Before you scan and remove anything, take two minutes to reduce risk. Security tools sometimes catch unwanted apps, but they can also flag legitimate tools (false positives). A little prep helps you avoid losing important files and makes stubborn cleanup easier.
- Save your work and close apps. Some scans and removals require a restart.
- Connect to a reliable internet connection so Defender can update security intelligence (definitions) and use cloud-based checks if enabled.
- Confirm Microsoft Defender is active. If a third-party antivirus is installed, Windows may disable parts of Defender. You can still use Windows Security to see what is protecting your device.
- Back up critical files (school/work documents, photos). Use an external drive or trusted cloud storage. Keep the backup disconnected when finished.
- Have admin access ready. Some actions in Protection History need administrator permissions.
- If you use BitLocker device encryption, be prepared for a reboot during the offline scan. In managed environments, follow your organization’s guidance; you may need the recovery key.
If you want a broader Windows 11 hardening checklist after cleanup, TechZeitGeist has practical basics on setup and safety in setting up a new Windows laptop step by step and privacy-related switches in Windows 11 privacy settings.
Step-by-Step Instruction
The flow below prioritizes the fastest safe wins first and escalates only if needed. Take your time and read what Windows Security reports after each scan.
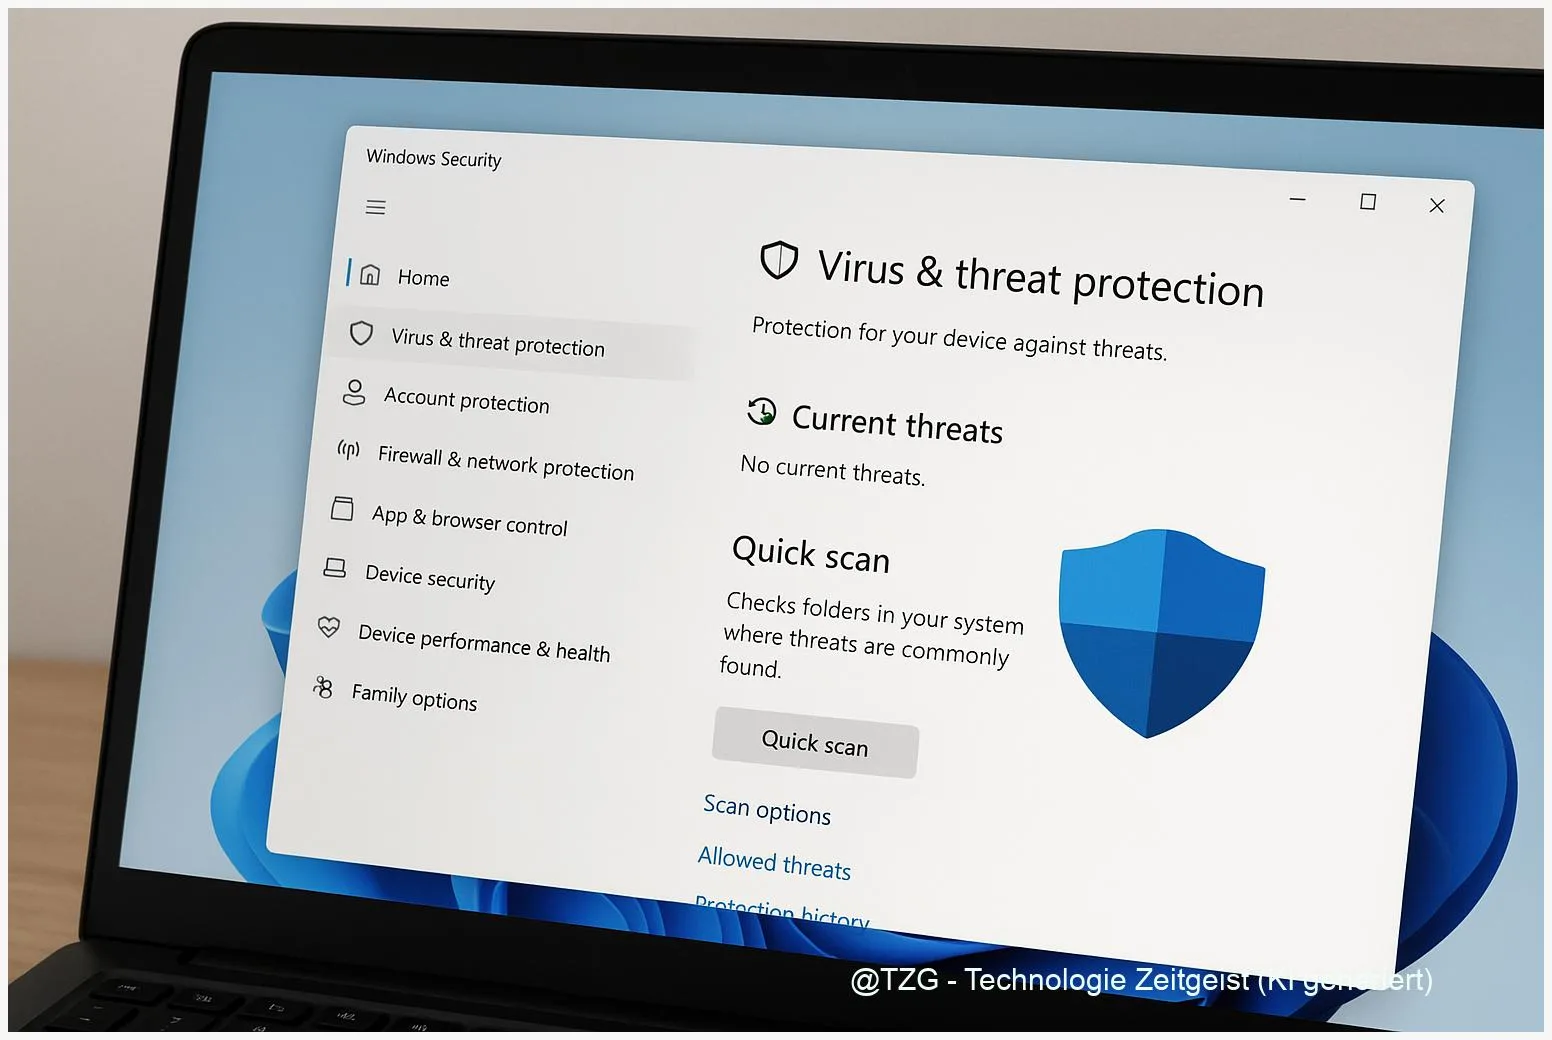
- Open Windows Security: Press Start, type Windows Security, and open the app. Go to Virus & threat protection.
- Update protection first: In the same area, look for Virus & threat protection updates and use Check for updates (wording may vary slightly). Updated intelligence improves detection.
- Run a Quick scan: Click Quick scan. While it runs, avoid downloading new apps or opening unknown attachments.
- Review results in Protection History: In Windows Security, open Protection history. Select recent items to see what was detected and what action was taken (for example, quarantined or removed).
- Handle quarantined items carefully: If an item is listed as quarantined, choose actions like Remove (recommended if you do not recognize it) or Restore only if you are confident it is a false positive. If unsure, do not restore.
- Run a Full scan if you still suspect infection: In Virus & threat protection, open Scan options and select Full scan. Expect it to take a while on systems with lots of files.
- Use a Custom scan for specific locations: If you downloaded something suspicious into a known folder (for example, Downloads) or you want to check a USB drive, choose Custom scan and point Defender to that folder/drive.
- Escalate to Microsoft Defender Offline scan for stubborn cases: Go to Scan options, choose Microsoft Defender Offline scan, then start it. Save everything first: the PC will restart. After Windows boots back up, return to Protection history to review what happened.
- Reboot once more if cleanup occurred: Even after removal, a normal restart can help finalize remediation (for example, removing locked files).
If everything looks clean but your browser still behaves oddly, check installed browser extensions and startup apps. Malware removal is often a combination of scanning plus undoing unwanted changes.
Tips, Troubleshooting, and Variants
“Offline scan ran, but I can’t find results.” This is a common point of confusion. After the reboot, open Windows Security and check Protection history. Some users report that clean scans leave little to no visible entry; focus on whether threats were detected and remediated rather than expecting a detailed “all clear” report.
Defender keeps detecting the same threat again and again. That can mean a leftover startup entry, a browser extension, or another program re-downloading it. Run a Full scan, then check recently installed apps, browser add-ons, and Startup apps in Windows settings. If you are in a school or work environment, ask IT before changing managed settings.
Something important was quarantined. Do not rush to restore. First, consider whether you truly need that file. If it is business-critical, verify its source, and only then use the restore action. Microsoft documents also describe restoring quarantined items via official methods, but the safest path for most people is using the Windows Security interface and restoring only when you are sure.
Scan options look different on my PC. Windows 11 wording can vary slightly by region and updates, but the navigation is stable: Windows Security → Virus & threat protection → Scan options.
After cleanup: reduce the chance of re-infection. Keep Windows Update active, avoid running unknown downloads, and consider turning on features that strengthen real-time protection (such as cloud-delivered protection and tamper protection) if available on your system. For everyday safety habits against phishing and risky downloads, TechZeitGeist also covers simple rules in everyday anti-phishing tips.
Conclusion
Microsoft Defender in Windows 11 is more than a “basic antivirus” if you use it systematically. Start by updating protection, run a quick scan, then review Protection History so you know what was quarantined or removed. If the signs of infection persist, a full scan and, as a stronger measure, the Microsoft Defender Offline scan can catch threats that hide during normal Windows use. After remediation, it is worth checking browser extensions and startup apps to prevent the same problem from coming back.
Did these steps help on your PC, or did you get stuck at a specific scan or quarantine message? Share what you saw (without personal data), and consider sending this guide to someone who keeps postponing their Windows security check.


Leave a Reply