If your PC suddenly shows a black screen, loops on the logo, or displays “Automatic Repair” without getting into Windows, a Windows 11 recovery USB can save you a lot of stress. This guide shows how to create a Windows 11 recovery drive and how to boot from it to run Startup Repair, System Restore, and other safe recovery tools. You will also learn what to prepare (BitLocker key, backups) so you don’t get stuck mid-fix.
Introduction
Boot problems rarely come with a warning. One day Windows 11 starts normally, the next day you see a spinning circle forever, a “Boot device not found” message, or you are pushed into an “Automatic Repair” loop. Sometimes it is caused by a failed update, a driver issue, or a corrupted startup configuration. Other times a disk problem is involved.
The good news: you often don’t need to reinstall everything right away. Windows includes a recovery environment (WinRE, short for Windows Recovery Environment) that can diagnose and repair common startup issues. The challenge is getting into those tools when the PC won’t boot.
A recovery USB is the practical answer. It gives you a reliable way to start the recovery tools from outside your normal Windows installation and attempt safe fixes step by step, without guessing.
Basics and Overview: What a Windows 11 recovery USB actually does
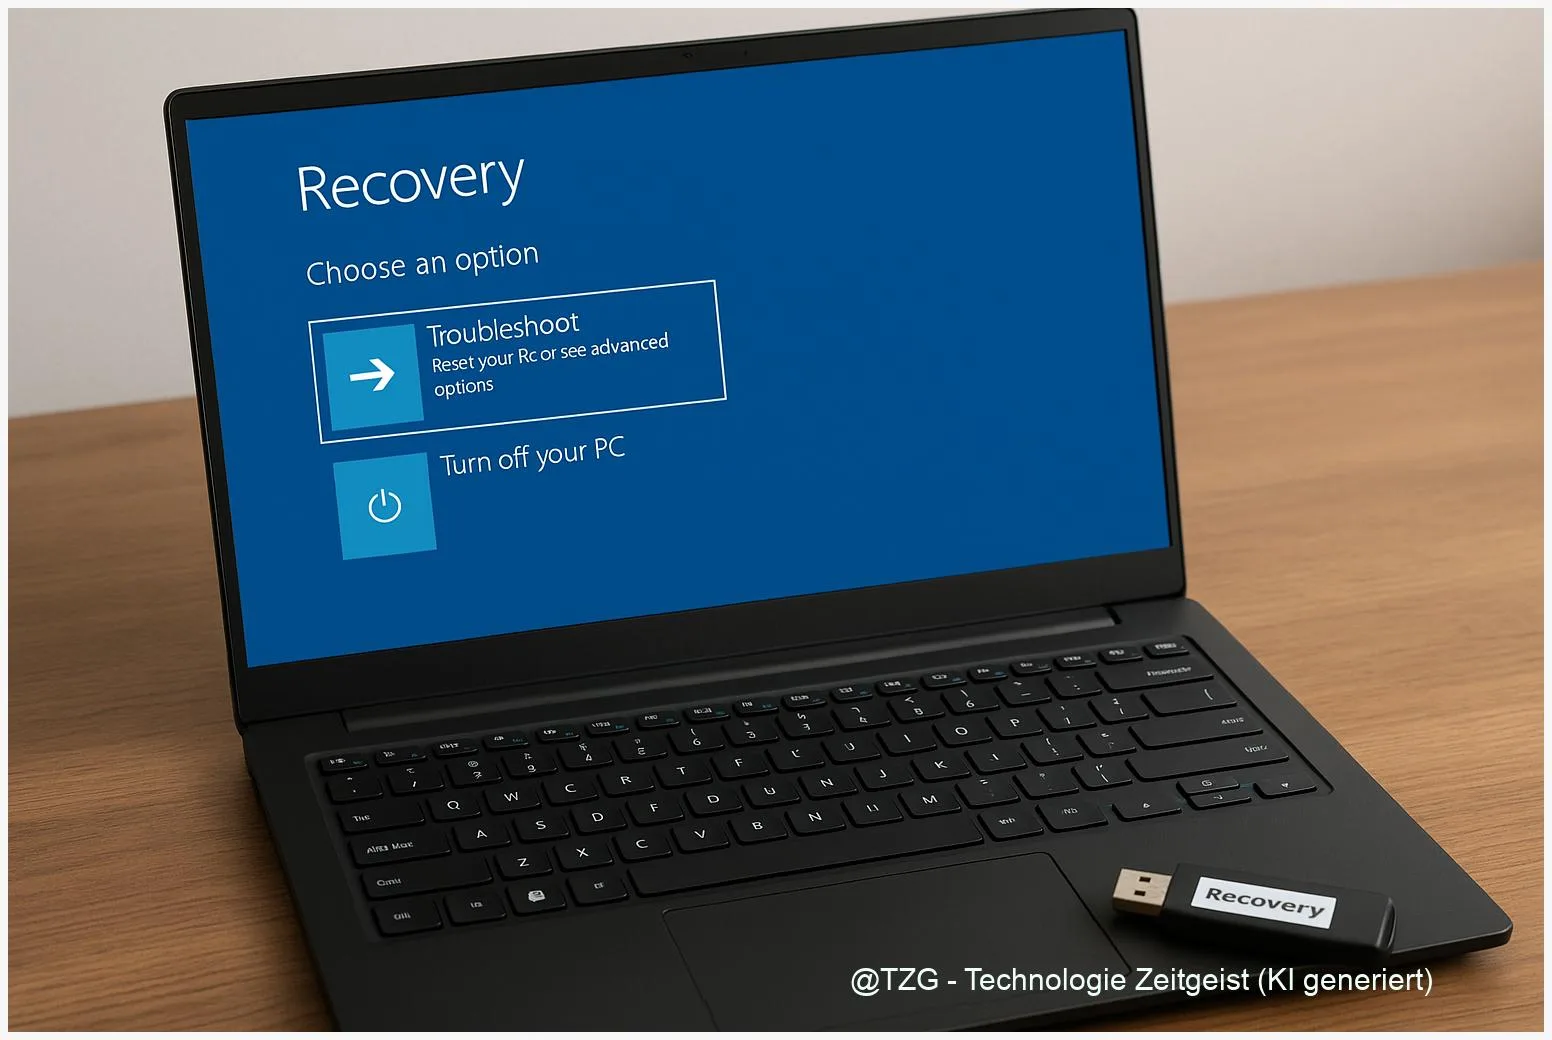
A recovery USB (often called a “recovery drive”) is a USB stick prepared by Windows that can start your PC into WinRE. WinRE is a minimal repair system based on Windows PE (a lightweight Windows used for setup and recovery). From there, you can run tools such as Startup Repair, System Restore, and Reset this PC.
Important distinction: a recovery drive is not the same as a Windows installation USB. A recovery drive focuses on repair and recovery options. An installation USB is mainly used to install Windows from scratch. Microsoft offers both approaches, and which one you use depends on your goal.
A recovery USB is like a spare key for your PC: it doesn’t solve every problem, but it gets you back to the controls when Windows can’t open the door.
When you create a recovery drive and choose to back up system files, Windows copies the files needed for recovery to the USB. The process wipes the USB, and it does not back up your personal files. For those, you still need a separate backup strategy.
| Option or Variant | Description | Suitable for |
|---|---|---|
| Recovery drive (Windows tool) | Creates a Windows 11 recovery USB with WinRE tools; can include system files for recovery. | Fixing boot issues, accessing Startup Repair and System Restore. |
| Windows installation media | Created with Microsoft’s media tool; used to install or reinstall Windows and access repair options. | If recovery drive is missing or you may need a reinstall. |
Preparation and Prerequisites
Creating the USB is easiest while your PC still boots. If your Windows 11 device is already stuck, use a friend’s or family PC (also Windows) to create installation media instead, then use its “Repair your computer” option to access WinRE. Either way, prepare a few essentials so the recovery process stays safe and predictable.
Before you start, check the following:
- A USB stick you can erase: Microsoft notes at least 8 GB, but bigger is often more comfortable. Everything on the stick will be deleted.
- Administrator access: the recovery drive tool needs admin rights.
- BitLocker recovery key (if used): if your system drive is encrypted, WinRE may ask for the key before it can access the Windows installation. Microsoft explicitly warns about this for recovery scenarios.
- Backup mindset: repairs are usually safe, but if you suspect disk damage, prioritize copying important files first (if possible) rather than repeatedly trying fixes.
- Know your boot menu key: many PCs use F12, Esc, or F9; exact keys depend on the manufacturer. If unsure, check your device manual or support page.
If your Windows boots but feels unstable, creating the recovery drive is a smart first step before you change drivers or try major updates.
Step-by-Step Instruction
The steps below cover two things: (1) creating a recovery USB in Windows 11, and (2) using it to run the most common boot repair tools in WinRE. Keep the USB plugged in directly (not through a loose hub) to avoid detection issues at startup.
- Create the recovery drive in Windows 11: Open the Start menu and search for Recovery Drive (the classic Control Panel tool). Select it and confirm the admin prompt.
- Include system files: In the wizard, enable the option to Back up system files to the recovery drive (wording may vary slightly). This increases the chance that recovery features work even if system files are damaged.
- Select your USB stick: Choose the correct drive letter carefully. Confirm that the USB will be erased, then start the creation process. It can take a while depending on your PC.
- Boot the broken PC from the USB: Plug the recovery USB into the affected PC, power it on, and open the boot menu (common keys: F12/Esc). Select the USB device. If you land in a blue recovery menu, you are in WinRE.
- Run Startup Repair first: Go to Troubleshoot > Advanced options > Startup Repair. Choose your Windows installation/account if asked. This tool attempts to fix startup configuration issues automatically.
- If Windows started recently, try System Restore: In Advanced options, choose System Restore. Pick a restore point from before the boot problem. This can roll back problematic drivers or updates without deleting personal files (apps installed after the restore point may be affected).
- If you need a bigger reset: Use Troubleshoot > Reset this PC. Read options carefully. “Keep my files” keeps your personal files but removes apps and resets settings; “Remove everything” is more drastic.
If everything worked, the PC will restart normally into Windows 11. If you still return to WinRE or see the same error screen, move to the troubleshooting section below to decide on the next safe step.
Tips, Troubleshooting, and Variants
The USB does not show up in the boot menu: Try another USB port (preferably a rear port on desktop PCs). If your device supports both USB-A and USB-C, use a direct port and avoid adapters. Also check UEFI settings: some systems hide external boot behind a “USB boot” toggle.
BitLocker blocks access: If WinRE asks for a recovery key, you must provide it to access the Windows installation on that drive. If you don’t have it, look for it in your Microsoft account device recovery keys page (if you used one) or in your organization’s IT process.
Startup Repair fails (or loops): That happens. The next safest step is usually System Restore (if you have restore points). If none are available, consider “Keep my files” reset. Repeated repair attempts can be counterproductive if the storage drive is physically failing.
Recovery drive vs. installation media as a fallback: If you could not create a recovery drive in time, Microsoft’s installation media still offers WinRE via the Repair your computer option in setup. This is also helpful if you suspect the recovery USB itself is outdated or damaged.
Practical prevention tip: Keep your recovery USB labeled and stored safely. After major Windows changes, it can be worth recreating it so the recovery files match your current Windows 11 setup more closely.
Conclusion
A recovery USB is one of the simplest safety nets you can create for Windows 11. Once it is ready, you can access WinRE even when your PC won’t boot, and you can try fixes in a sensible order: Startup Repair first, then System Restore, and only then stronger options like Reset. The key to a smooth recovery is preparation: use an empty USB, keep your BitLocker recovery key available, and treat personal backups as separate from recovery tools.
Have you already created a recovery USB for your main PC, or did you only think about it after a boot problem? Share what helped (or what didn’t) so others can troubleshoot more calmly.


Leave a Reply