Want to move photos, videos, or PDFs from your phone to your PC without a cable or cloud upload? Quick Share Windows makes that easy: it lets you send files directly between Android and Windows over Bluetooth discovery and a fast Wi‑Fi connection. In the next minutes you’ll set it up once, then share from the Android Share menu or with drag-and-drop on your computer.
Introduction
You take a few photos on your Android phone, want them on your Windows laptop, and suddenly you’re juggling options: email (too slow), messaging apps (compressed), a cable (not in your bag), or a cloud drive (upload first, then download). For many everyday tasks, the best solution is a direct device-to-device transfer.
Quick Share is designed exactly for that. It’s built into modern Android and available as an app for Windows. Once it’s set up, sending a single picture or a whole folder feels like sending something to a nearby printer: pick the file, choose the target PC, accept, done.
This guide focuses on a reliable setup that still makes sense even if menus change slightly. You’ll learn what Quick Share does in the background, which settings matter most for privacy, and what to check when your PC doesn’t show up.
Basics and Overview: How Quick Share Windows works
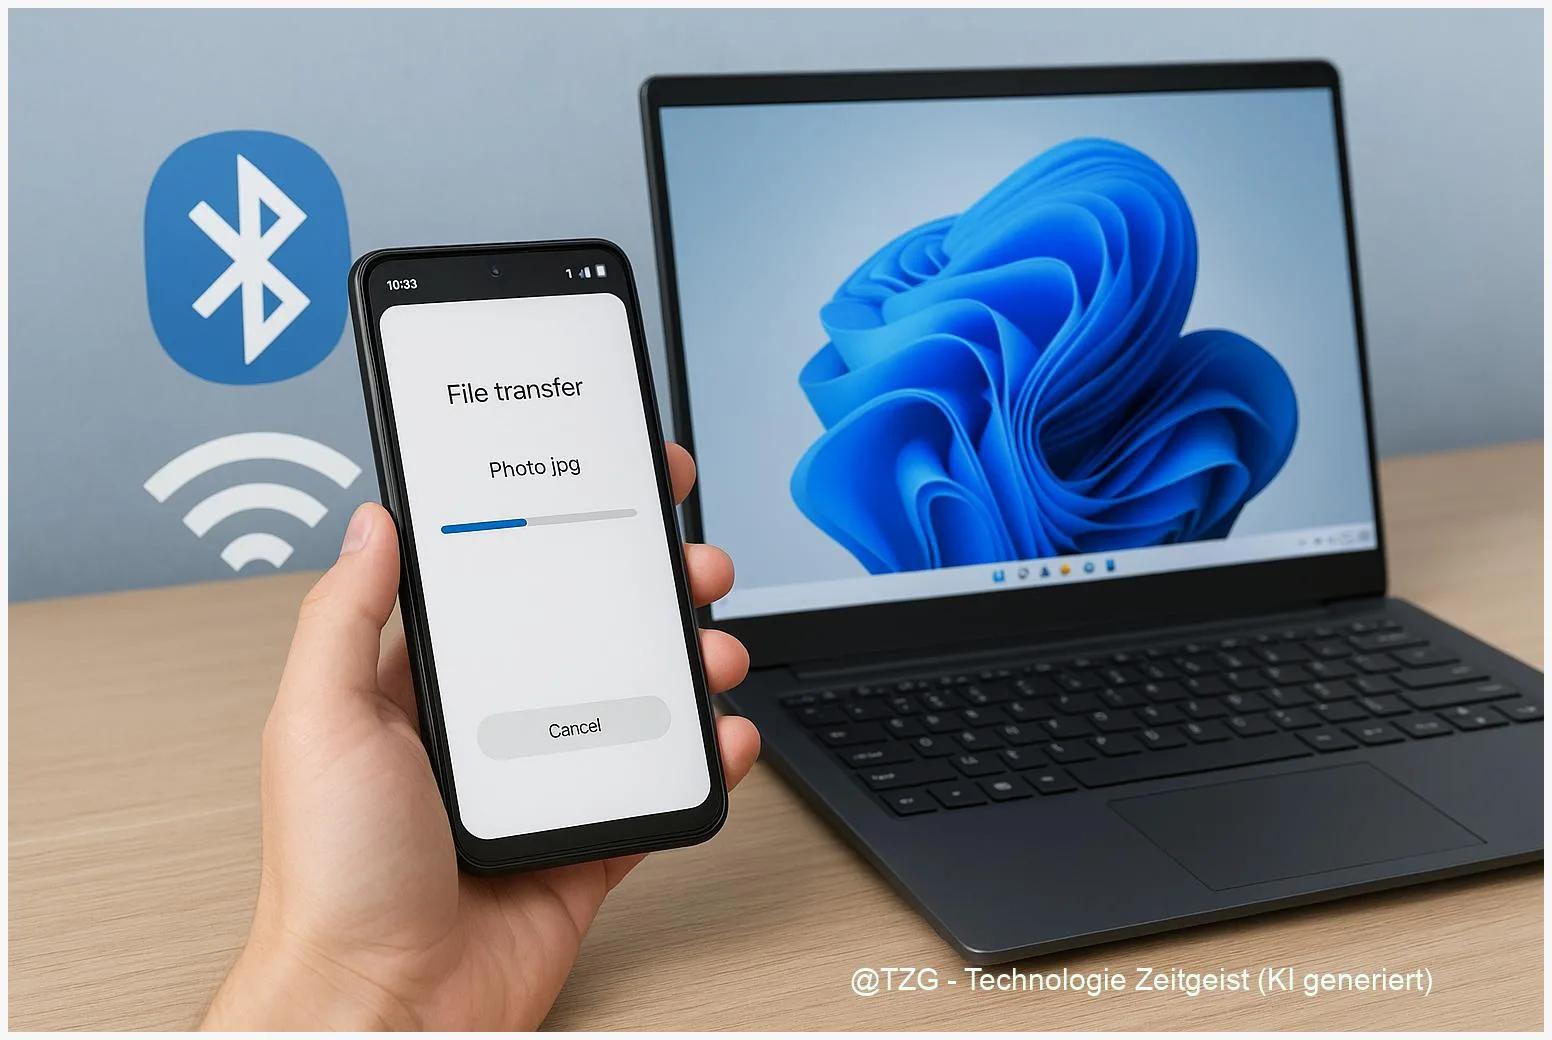
Quick Share is Google’s nearby file sharing feature for Android, and it can also connect to Windows through the Quick Share app. In simple terms, it works in two phases: first, devices find each other using Bluetooth; then the actual transfer usually happens over a faster local connection (typically Wi‑Fi, often via a direct link between devices). You don’t need to upload your files to the internet to make it work.
On Android, you’ll usually start Quick Share from the system Share sheet (the same place you’d pick Mail, Messages, or a social app). On Windows, you can receive files in the Quick Share window and, depending on version, also send files from the PC.
Quick Share is most convenient when you treat it like “nearby delivery”: keep it set to a safe visibility mode, then send in seconds whenever you need it.
A key term is visibility. That setting decides who can see your device for incoming transfers. Common options are “Your devices”, “Contacts”, and “Everyone” (often limited to a short time window). For everyday use, “Contacts” or “Your devices” is usually the right balance between convenience and privacy.
| Option or Variant | Description | Suitable for |
|---|---|---|
| Your devices | Only devices signed into your Google account can find and send to you (depending on device settings). | Personal phone + personal laptop, frequent transfers. |
| Contacts / Everyone (temporary) | Broader discovery for people nearby; “Everyone” is commonly time-limited for safety. | One-off sharing in a trusted environment, quick hand-offs. |
Preparation and Prerequisites
Before you start, check the basics. Quick Share between Android and Windows needs supported versions and working radios (Bluetooth and Wi‑Fi). The official Windows app requires a 64‑bit Windows PC (Windows 10 or later). For ARM-based Windows devices, Google notes Windows 11 or later. On Android, Quick Share is supported on Android 6.0 and up.
Do these quick prep steps once:
- Update Android and Windows to current versions available for your device.
- Turn on Bluetooth and Wi‑Fi on both devices. Being on the same Wi‑Fi network can help, but Quick Share can also create a direct link depending on the situation.
- Install Quick Share on Windows from the official Google download page. Sign in with your Google account if you want “Your devices” to work smoothly.
- Choose a safe visibility mode (start with “Contacts” or “Your devices”). Use “Everyone” only when you really need it.
- Allow permissions on Android if prompted (for example Nearby devices). On some Android versions, location-related requirements may appear because scanning for nearby devices used to be tied to those controls.
Practical tip: place phone and laptop on the same desk for the first setup. Short distance reduces pairing and discovery issues.
Step-by-Step Instruction
The steps below cover the most typical flow: send from Android, receive on Windows. Menu names can vary slightly by manufacturer, but the logic stays the same.
- Install and open Quick Share on Windows. Download it from Google’s official page, install it, then open the app. In the window, look for a setting like device visibility or “Receive from”.
- Set your Windows PC to “Contacts” or “Your devices”. If you’re testing, you can briefly switch to “Everyone” to confirm discovery works. Don’t leave it on permanently in public places.
- On Android, open the file you want to send. Examples: a photo in Google Photos/Gallery, a PDF in Files, or a document in an app that supports sharing.
- Tap Share, then select Quick Share. You’ll see a list of nearby devices. If your PC doesn’t appear immediately, wait a few seconds; Bluetooth discovery can take a moment.
- Select your Windows PC. Android may show the PC name and a computer icon. If a PIN or confirmation code appears, verify it matches on both screens.
- Accept on Windows. A notification or the Quick Share window will ask to accept the incoming file. Confirm the save location if prompted.
- Find the received file. By default, Quick Share typically saves to your Downloads area (often in a Quick Share-related folder). Open File Explorer and sort by “Date modified” if you can’t spot it.
If everything worked, you’ll see a transfer completed message on both devices. For photos and videos, do a quick open test on the PC to confirm the file arrived uncompressed and intact.
Tips, Troubleshooting, and Variants
If your devices don’t find each other, the cause is usually simple: visibility, wireless radios, or network restrictions. Start with these fixes before you reinstall anything.
Common problems and fixes:
- PC doesn’t appear on Android: Open the Quick Share app on Windows and keep it in the foreground, set visibility to “Everyone” for a short test, and confirm Bluetooth is on.
- Transfer starts but fails: Toggle Wi‑Fi off/on on both devices, then retry. Also try moving closer (a few meters can matter).
- Works at home but not at school/office: Some managed networks block peer-to-peer connections. If allowed, test using a phone hotspot or a different Wi‑Fi network.
- Wrong device names or confusion in crowded places: Rename your Windows PC (Windows Settings) to something recognizable, and avoid leaving “Everyone” enabled.
- Privacy concern: Prefer “Your devices” when you’re mainly sending to your own laptop. Use “Everyone” only when you actively send or receive, then switch back.
Helpful usage tips: Send multiple items in one go by selecting them in your gallery or file manager first, then sharing once. For repeated transfers, keep Quick Share installed and pinned on Windows so you can open it quickly. If you also share between Windows PCs, Windows has its own built-in “Nearby sharing” feature; it’s separate from Quick Share and is mainly for PC-to-PC transfers.
Conclusion
Quick Share is one of the simplest ways to move files from Android to a Windows PC without cables or cloud detours. The reliable setup is mostly about the basics: install the Windows app from an official source, keep Bluetooth and Wi‑Fi enabled, and choose a visibility mode that fits your everyday life. Once it’s configured, sharing becomes a two-step habit: Share on Android, accept on Windows. If something goes wrong, a quick visibility check and a Wi‑Fi/Bluetooth toggle solves most cases.
Try sending one photo and one PDF today, then tell us what worked best for you (and where you got stuck) so others can learn from it.


Leave a Reply