If your PC start takes long, the cause is often apps that launch automatically after sign-in. This guide shows how to Autostart Windows 11 deaktivieren (disable startup apps in Windows 11) so your desktop becomes usable faster and background load stays lower. You will learn where Windows lists startup programs, how to switch off the non-essential ones, and how to undo changes safely if something stops working.
Introduction
Your Windows 11 PC may show the desktop quickly, but still feel sluggish for the first minute: the fan ramps up, apps “wake up” in the background, and clicks react with a delay. Often it is not Windows itself, but extra software that starts automatically every time you sign in—messengers, game launchers, cloud tools, update helpers, and vendor utilities.
The tricky part: many of these tools are useful sometimes, but not necessarily at every boot. When too many of them compete for CPU, memory, and disk access at the same moment, startup feels slow even on modern hardware.
Good news: Windows 11 includes built-in controls to manage startup programs, with clear on/off switches and an “impact” hint. With a few careful changes you can make Windows 11 feel noticeably snappier—without uninstalling anything and without risky “optimizer” apps.
Basics and Overview: Autostart Windows 11 deaktivieren
“Startup apps” are programs that Windows launches automatically after you sign in. Some are obvious (for example a chat app), others run quietly in the system tray. The benefit is convenience. The downside is that they can slow down the first moments after login and keep using resources in the background.
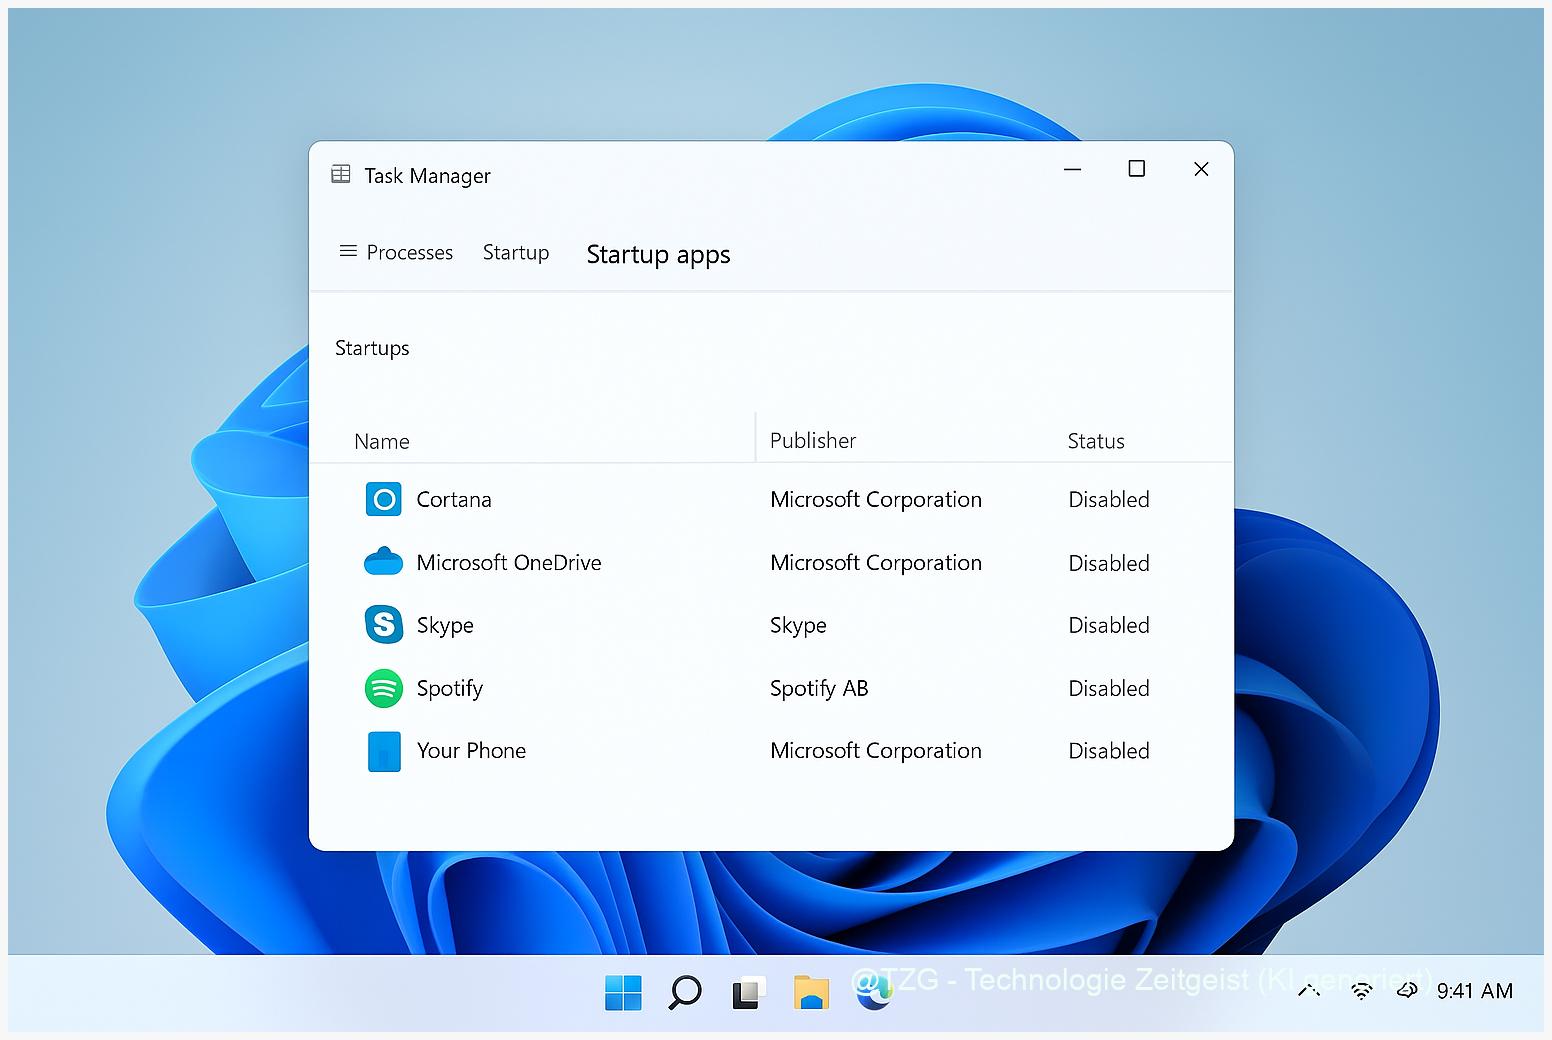
Windows 11 mainly shows startup programs in two places: the Task Manager and the Settings app. Both provide a simple enable/disable control. Task Manager also helps you identify the publisher, which is useful when a name is unfamiliar.
Disabling a startup app usually does not remove it; it simply stops it from launching automatically. You can still open the app normally whenever you need it.
Windows also labels many entries with a “startup impact” (typically Low/Medium/High). This is an estimate based on how much the app tends to slow startup. Treat it as a helpful hint, not as a precise measurement.
| Option or Variant | Description | Suitable for |
|---|---|---|
| Settings > Apps > Startup | Simple on/off toggles; easy for quick housekeeping. | Most users who want a clear list and fast changes. |
| Task Manager > Startup apps | Extra details like Publisher and Startup impact; quick disable via right-click. | Anyone who wants more context before turning items off. |
Preparation and Prerequisites
Before you start switching things off, take two minutes to make the process safe and predictable. You do not need special tools, but a bit of order helps—especially if you are not sure what each entry does.
Quick checklist:
- Save your work and close important apps. You may want to restart after changes.
- Use an administrator account if possible. Some entries are visible or changeable only with the right permissions.
- Plan a “must keep” list: security software, accessibility tools, password managers, and hardware drivers/utilities you rely on daily (for example touchpad gestures or audio control panels).
- Optional safety net: create a Windows restore point. It is usually not necessary for startup toggles, but it can be reassuring if you like a fallback.
If your goal is “Windows 11 faster overall,” remember that startup apps are only one piece. Still, reducing login clutter is one of the quickest wins because you feel the difference immediately.
Step-by-Step Instruction
The fastest and most informative path is Task Manager. You can still cross-check in Settings afterwards.
- Open Task Manager: press Ctrl + Shift + Esc. If you see a compact view, select More details.
- Go to startup management: select Startup apps in the left navigation (wording can vary slightly depending on Windows build).
- Sort to find the biggest suspects: click the Startup impact column (or similar) so High impact entries appear at the top.
- Check what you are about to disable: look at Name and Publisher. If you are unsure, leave it enabled for now and disable a more obvious item first.
- Disable one app: right-click the entry and choose Disable (or select it and use the Disable button). The Status should change to Disabled.
- Repeat in small batches: disable 2–4 non-essential items, not everything at once. This makes troubleshooting easier if a side effect appears.
- Restart and test: reboot your PC and pay attention to the first 1–2 minutes after login. Do your essentials still work (Wi‑Fi, audio controls, clipboard tools, security software)?
- Optional: verify in Settings: open Settings > Apps > Startup to confirm the toggles match your choices.
If everything feels normal after the restart, you are done. If something is missing (for example a sync tool), simply re-enable that specific entry—no reinstall needed.
Tips, Troubleshooting, and Variants
Nothing improved? Startup changes mainly affect the “right after login” phase. If Windows stays slow later, look at what runs continuously. In Task Manager, check the Processes tab for unusually high CPU, memory, or disk usage.
An app no longer updates or syncs: many cloud, messenger, or game clients rely on autostart for background syncing. Re-enable only that app, or look inside the app’s own settings for a lighter “start minimized” option.
You cannot disable an entry: some items are protected or managed by policies (common on school/work devices). In that case, your best option is to use the PC as provided or ask your administrator.
What you should usually leave alone: Windows security components, input drivers (touchpad, keyboard hotkeys), accessibility tools, and anything you clearly depend on every day. If in doubt, disable only “nice to have” apps first.
Variant: use Settings for a simpler view. Go to Settings > Apps > Startup and switch off items you recognize. This is also a good second opinion if you want to double-check what you changed in Task Manager.
Tip for a clean routine: once per month, review the list again. New software often adds itself to startup during installation. If you want more structured Windows performance housekeeping, TechZeitGeist also covers related basics like freeing up storage in Windows 11 and reducing background app activity.
Conclusion
When a PC start takes long, the easiest fix is often reducing what launches automatically. With Windows 11, you can disable startup programs directly in Task Manager or in Settings, and you can undo every change just as quickly. Focus on non-essential tools first, make changes in small batches, and test after a restart. That way you get a faster, calmer login experience—without breaking the apps you actually need.
Which startup apps did you keep, and which ones surprised you? Share your setup—or try the steps on a second PC and compare the difference.


Leave a Reply