Passwords are easy to forget and annoying to type—especially on a laptop in a rush. This guide shows how to set up Windows Hello in Windows 11 so you can sign in with a face scan, fingerprint, and a secure PIN fallback. You will learn what you need, where the settings live, and how to fix common issues when Windows Hello is missing or won’t recognize you.
Introduction
You open your laptop to reply to a message, join an online class, or quickly check a file—then you hit the same speed bump: typing a long password. On a small keyboard, in low light, or when you’re wearing gloves, that can be surprisingly frustrating. Windows Hello is Microsoft’s built-in answer: you sign in with something you have (your device) and something you are (your face or fingerprint), with a PIN as a safe backup.
The goal is simple: faster sign-in without lowering security. The steps are also reversible, so you can try Windows Hello and still keep traditional options available. The guide below walks you through the exact Windows 11 menus, what you should check first, and what to do when the options are greyed out or not offered.
Basics and Overview: how to set up Windows Hello in Windows 11
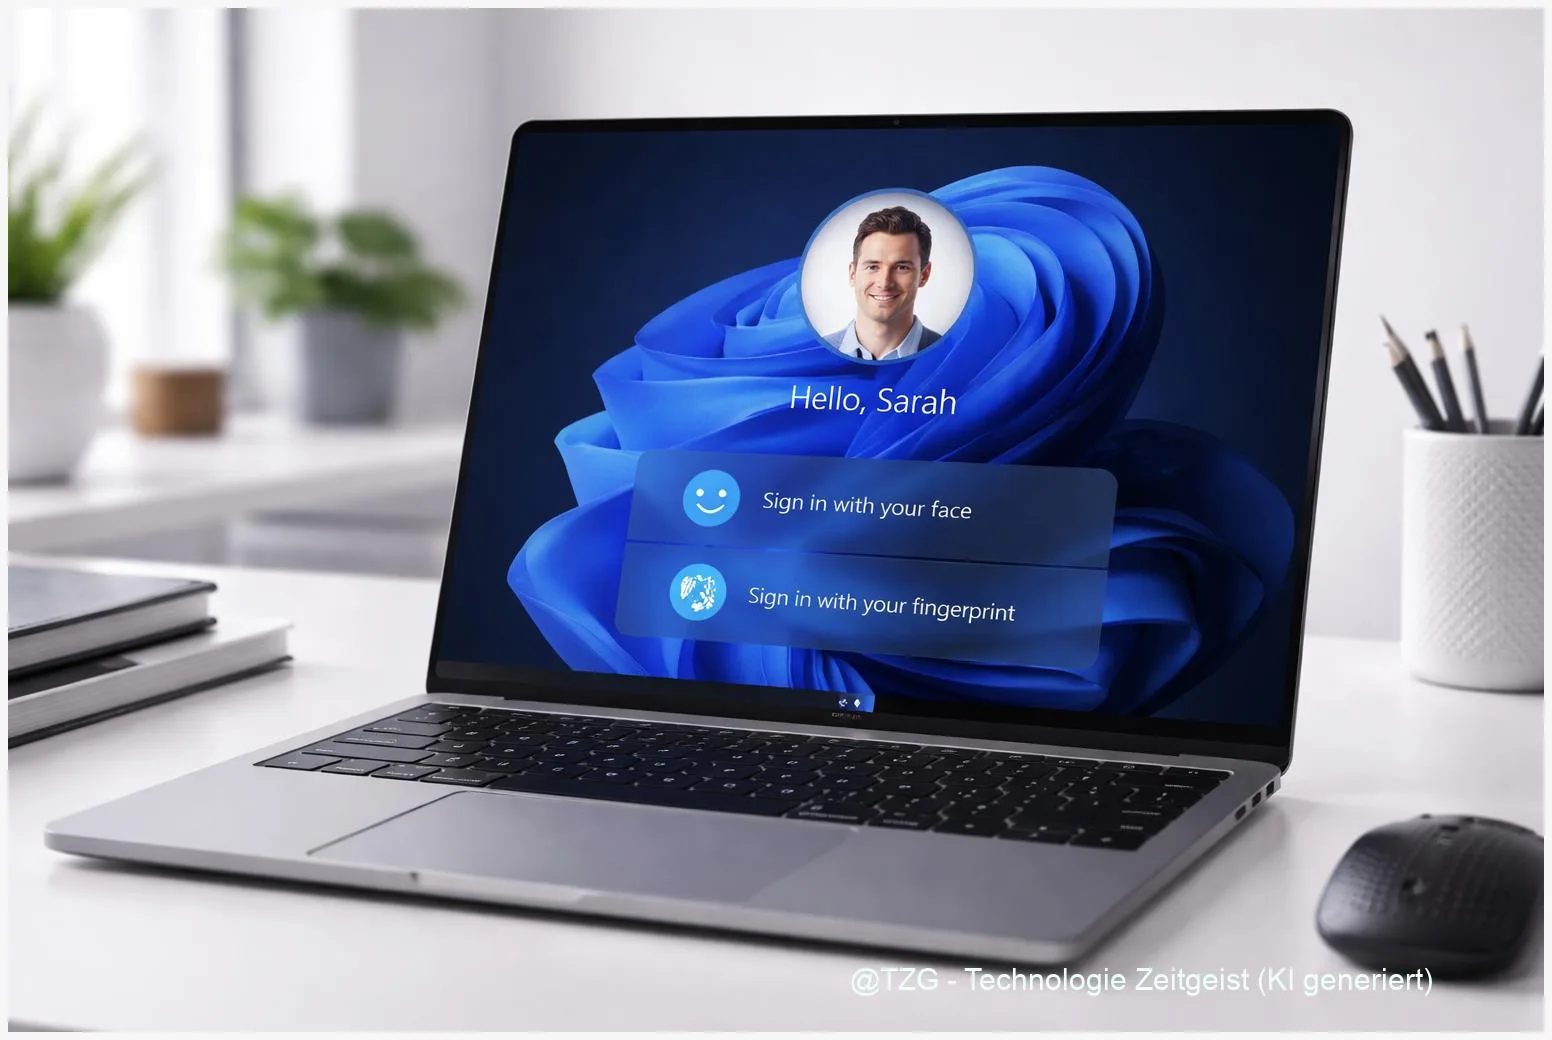
Windows Hello is a set of sign-in methods in Windows 11: Windows Hello Face (face recognition), Windows Hello Fingerprint, and Windows Hello PIN. The important detail for everyday use: face and fingerprint depend on your device’s hardware, but the PIN works on virtually any Windows 11 PC and is used as a fallback.
Windows Hello is designed so your biometric data stays protected on the device rather than being a password you regularly type and might reuse elsewhere.
“Biometric” means you use a physical feature (like a fingerprint) to prove it’s you. For face recognition, many compatible laptops use an IR (infrared) camera that can distinguish a real face more reliably than a basic webcam. If your PC doesn’t have the needed sensor, Windows will simply not offer that option.
| Option or Variant | Description | Suitable for |
|---|---|---|
| Windows Hello PIN | A device-linked PIN used for sign-in and as a backup when biometrics fail. | All Windows 11 users; essential fallback. |
| Windows Hello Face / Fingerprint | Sign in with a compatible IR camera or fingerprint reader after a short enrollment. | Laptops, 2-in-1 devices, keyboards with fingerprint sensors. |
Preparation and Prerequisites
Before you start, make sure you can complete the setup without interruptions. Windows Hello changes sign-in settings, so it’s best done when you have a few minutes and access to your account credentials.
Check these prerequisites first:
- Windows 11 is up to date: Go to Settings > Windows Update and install pending updates. This can prevent driver-related Hello issues.
- You can sign in normally: Have your current password available (local account or Microsoft account), because Windows may ask you to confirm it.
- Hardware support (for face/fingerprint): Your device needs a Windows Hello-compatible IR camera for Face or a supported fingerprint reader for Fingerprint. If the option doesn’t appear later, this is usually why.
- Clean sensor and good positioning: Wipe the camera area, and make sure your finger is clean and dry for fingerprint enrollment.
- Admin rights (sometimes): On school or work PCs, policies can disable Windows Hello or require specific settings.
If you share a PC, plan which accounts should get Hello. Each Windows account enrolls its own face/fingerprint data separately.
Step-by-Step Instruction
You’ll do this in Windows 11 Settings. The names may vary slightly by update, but the path is consistent: account settings and sign-in options.
- Open Settings: Press Windows + I, then select Accounts.
- Go to sign-in options: Choose Sign-in options. You should see items like Facial recognition (Windows Hello), Fingerprint recognition (Windows Hello), and PIN (Windows Hello).
- Set up the Windows Hello PIN first: Select PIN (Windows Hello) > Set up (or Add). Confirm your password if asked, then choose a PIN you can remember. If your PC offers it, you can also allow letters and symbols for a stronger PIN.
- Set up Windows Hello Face (if available): Select Facial recognition (Windows Hello) > Set up > Get started. Look at the camera and follow the on-screen frame until enrollment completes.
- Set up Windows Hello Fingerprint (if available): Select Fingerprint recognition (Windows Hello) > Set up > Get started. Place your finger on the sensor repeatedly, adjusting angle and pressure as Windows requests.
- Test your sign-in: Lock your PC with Windows + L. On the lock screen, look at the camera or use the fingerprint sensor. If it fails, choose Sign-in options and use the PIN.
- (Optional) Improve recognition: In the Face settings, look for an option like Improve recognition and run it if you often wear glasses or change your appearance.
If everything worked, the lock screen will show a short message such as a successful recognition prompt, and you’ll land on the desktop without typing your full password.
Tips, Troubleshooting, and Variants
If Windows Hello doesn’t show up or doesn’t work reliably, the cause is usually hardware support, policies, or drivers. These checks solve many everyday problems without deep technical work.
Common issues and fixes:
- Face/Fingerprint option is missing: Your PC may not have a compatible IR camera or fingerprint reader. Check Device Manager for camera/biometric devices, and install the latest OEM drivers. Also check that Windows is fully updated.
- “Something went wrong” during setup: Restart the PC, then try again. If it still fails, remove the Hello method (if the button is available) and set it up again.
- Face unlock fails in certain lighting: Clean the camera area and remove screen protectors that cover camera cutouts. If you mainly use the PC in dim rooms, run Improve recognition when the lighting is similar to your normal setup.
- Fingerprint recognition is inconsistent: Re-enroll the same finger once or twice, and consider adding a second finger. Small changes in finger position matter.
- Work/school device restrictions: Some organizations manage Windows Hello settings centrally. If options are greyed out, you may need to contact your admin.
Practical variants: If you use a desktop PC, a USB fingerprint reader can add Hello support. On some laptops, Hello Face works best for quick unlock, while fingerprint is more reliable when you wear a mask or the camera is blocked.
Privacy and safety note: Keep the PIN private, and don’t share it like a password. It’s designed to be linked to your device, but it still grants access if someone knows it. If you ever suspect someone learned your PIN, change it in the same Sign-in options menu.
Conclusion
Windows Hello can make Windows 11 feel noticeably more convenient: you unlock your PC in seconds and still keep a PIN as a reliable fallback. The key steps are simple—update Windows, create the Windows Hello PIN, then enroll your face or fingerprint if your hardware supports it. If something doesn’t appear or fails during setup, it’s usually a driver or compatibility issue, not something you did wrong.
Once it’s working, take a minute to test locking and unlocking a few times. That small routine check helps you trust the setup before you rely on it every day.
Have you set up Windows Hello Face, Fingerprint, or only the PIN? Share what worked (or didn’t) on your device—and pass this guide along to someone who’s still typing passwords.


Leave a Reply